Multisite is a powerful tool for hosting many WordPress websites under the same domain. Changing the primary domain of a WordPress multisite requires updates in several locations. You will need access to the database and SFTP for your site before proceeding.
There are also a few items to be aware of when changing these values.
- Consistently use your Primary domain when updating these values.
- Do not switch between www and non-www versions.
- Some locations are noted as requiring HTTP or HTTPS protocol, so review these carefully.
Update Database
Updating a multisite domain begins in the database of the website. Be sure to consistently use the same version of your domain, and not switch the spelling or change between www/non-www.
We recommend using the non-www variation (EX: domain.com) instead of the www version (EX: www.domain.com) to ensure your subsites write their dependent URLs correctly.
NOTE: If your site uses a custom database prefix, this will impact the table names listed below. If this is the case then replace wp_ with your prefix in the following table names, or change your database prefix.
- Open phpMyAdmin to view the database. If you’re not sure how to open the database, review our guide here.
- On the left, click
wp_yourenvironment - Locate the
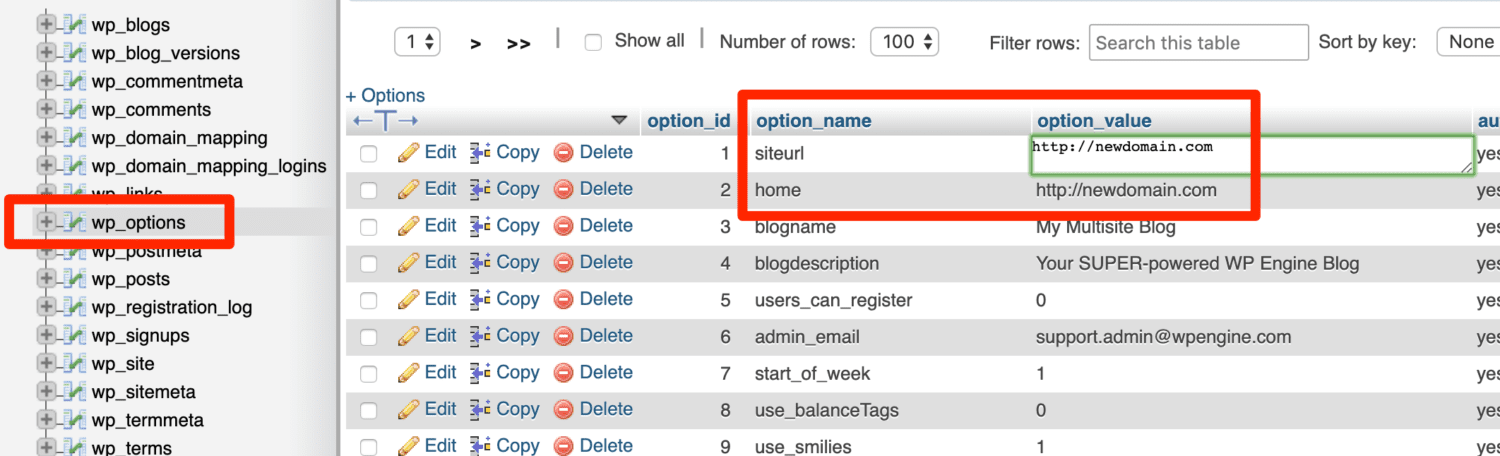
wp_optionstable in list and click on it to open - Find the option name and double click on the the option value next to it:
siteurl- This option should use the protocol, either http or https. EX:
http://newdomain.com
- Hit the ENTER or RETURN key to save the change
- Find the option name and double click on the the option value next to it:
home- This option should use the protocol, either http or https and exactly match the domain used previously. EX:
http://newdomain.com
- Hit the ENTER or RETURN key to save the change
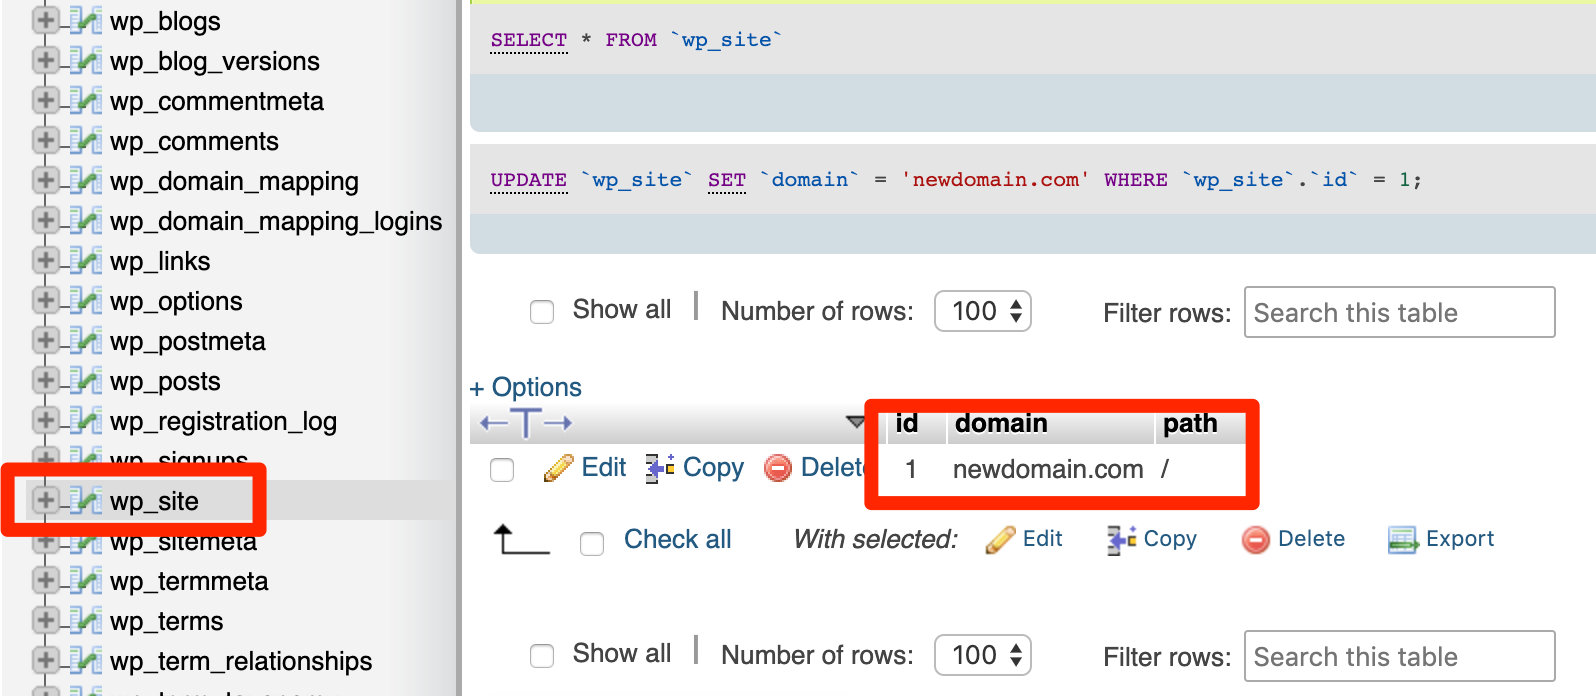
- On the far left, click on the table called
wp_site - Double click on the the domain value
- Update this to your domain name without http/https protocol. EX:
newdomain.com - Hit the ENTER or RETURN key to save the change
- On the far left, click on the table name
wp_sitemeta - Locate the following meta key and click the meta value next to it
siteurl- This option should use the protocol (http or https) and exactly match the domain used previously. It should include a trailing slash
/at the very end. EX:http://newdomain.com/

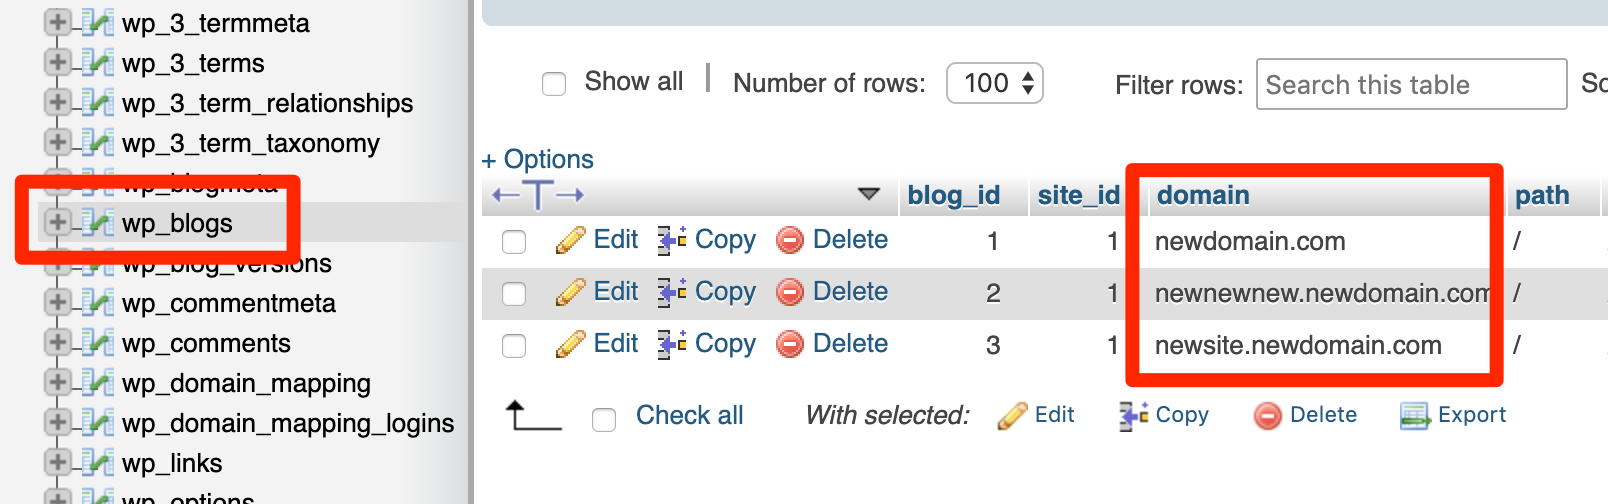
- On the far left, click on the table name
wp_blogs - If you have already added subsites you may see several rows here. Each value in the domain column should have its domain updated to reference your new domain. Do not include protocol (http/https) here.
- Subdirectory multisite: The domain column should simply list your old domain through any the rows. Update all rows to your new domain.
- EX:
coolsite.wpengine.comwould becomenewdomain.com
- EX:
- Subdomain multisite: The domain column will show several subdomains of your old domain. Keep the subdomain and simply append it to your new domain instead.
- EX 1:
coolsite.wpengine.comwould becomenewdomain.comandnewsite.coolsite.wpengine.comwould becomenewsite.newdomain.com. - EX 2:
oldsite.comwould becomenewdomain.com, andnewsite.oldsite.comwould becomenewsite.newdomain.com
- EX 1:
- Subdirectory multisite: The domain column should simply list your old domain through any the rows. Update all rows to your new domain.
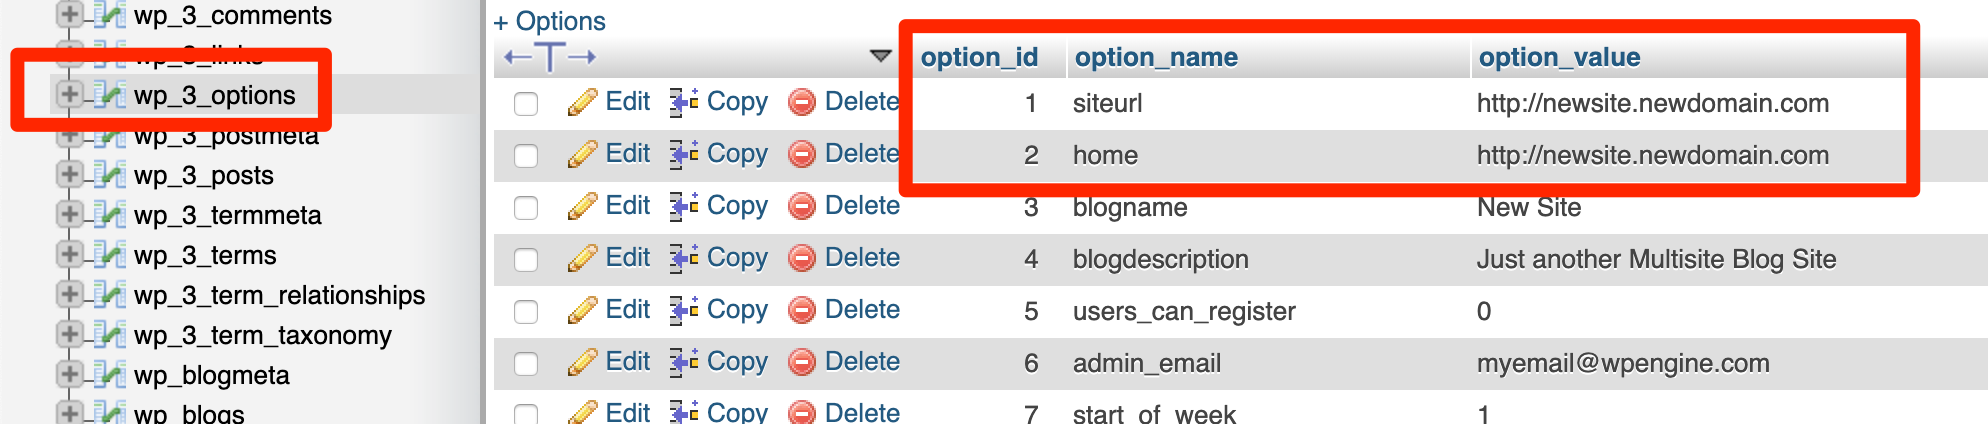
NOTE: The next database changes are required only if you have already added subsites. If you do not have subsites, skip to the next part of the guide.
- Each subsite has a set of database tables with a specific number added to the prefix. There may be several tables, it will vary by how many subsites you’ve already added.
- On the far left open each additional
wp_#_optionstable - Update the following option values:
siteurlhome- These should include http/https protocol.
List of Database Locations
If you’re comfortable with the database and simply need a brief list of the locations, they are found here. We’ve also noted where the http or https protocol should be included.
| Table | Option | Protocol? | Notes |
|---|---|---|---|
| wp_options | home | Yes | |
| wp_options | siteurl | Yes | |
| wp_site | domain | No | |
| wp_sitemeta | siteurl | Yes | Include trailing slash |
| wp_blogs | domain | No | Update all rows |
| wp_#_options | siteurl | Yes | Update all # options tables |
| wp_#_options | home | Yes | Update all # options tables |
Be sure to also update the wp-config.php file as detailed below.
Update wp-config.php
The last step requires modifying the WordPress configuration file on your website.
- Connect to your site using SFTP
- Download the wp-config.php file, located in your site’s root directory
- Update the following line to use your Primary Domain:
define( 'DOMAIN_CURRENT_SITE', 'newdomain.com' );- Do not include http/https protocol here.
- Save and upload the modified file, overwriting the original.

If you see the following lines, delete them. They will overwrite your database defines in some areas and will cause issues:
define( 'WP_HOME', 'http://somedomain.com' );
define( 'WP_SITEURL', 'http://somedomain.com' );