How Do I Fix the “sfc /scannow” Not Working? Fix Windows Resource Protection Could Not Start the Repair Service Error
There are a few different solutions to help you if you’re struggling to run the System File Checker and scan your device for corrupt files or missing resources.
Method 1. Start the Windows Modules Installer (TrustedInstaller)
The most straightforward solution is manually starting the required service. It’s important to configure the Windows Modules Installer in a way that allows it to start whenever you try to run the SFC scan. The steps below will guide you through this setup.
- Press the Windows + R keys on your keyboard. This is going to bring up the Run utility.
- Type in services.msc and click on the OK button. This is going to launch the Services window, which might take a few seconds to fully load.
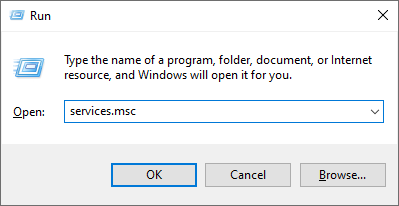
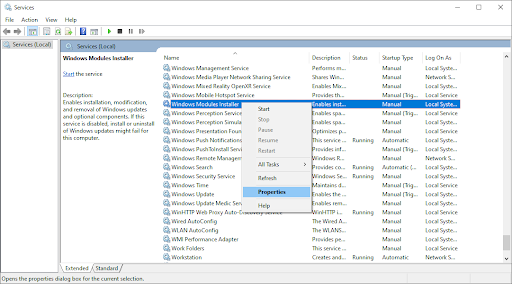
- Right-click on the Windows Modules Installer service and choose Properties.
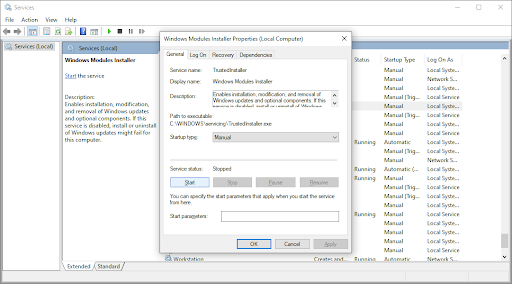
- Set the Startup type to Manual. If the service isn’t running, click on the Start button. Click Apply, then OK. You should be back at the list of services.
- Close the Services window and try running the “sfc /scannow” command again. If the scan still doesn’t work, move on to the next solution.
Method 2. Use the Command Prompt
This method is essentially the same one as the first but done in the Command Prompt. It’s possible that this solution may work, as you need administrative permissions to make the modification.
- Open the search bar in your taskbar by clicking on the magnifying glass icon. You can also bring it up with the Windows + S keyboard shortcut.
- Type cmd or Command Prompt in the search bar. When you see it in the results, right-click on it and choose Run as Administrator.
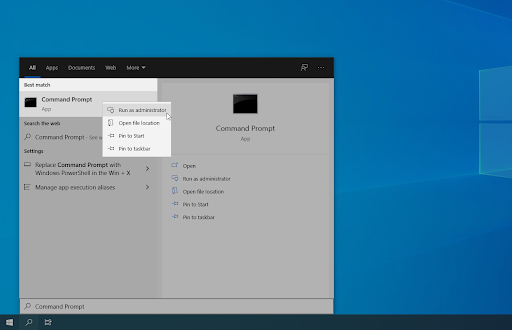
- When prompted by the User Account Control (UAC), click Yes to allow the app to launch with administrative permissions.
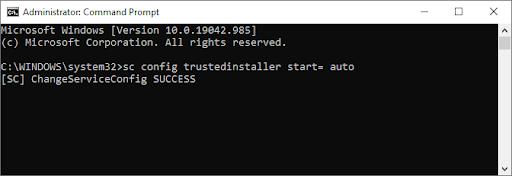
- Once the Command Prompt window is open, type in the following command and press Enter to execute it: sc config trustedinstaller start= auto. If the command worked, you should see the SUCCESS message.
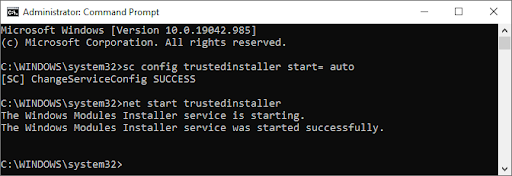
- Afterwards, execute the following command: net start trustedinstaller. There should be a message about the Windows Modules Installer service starting successfully.
- Now, you can try to run the System File Checker by executing the sfc /scannow command. If you still don’t have any luck running it, try a different method below.
Method 3. Try To Run the System File Checker in Safe Mode
There’s a possibility that a background application or service is interfering with the System File Checker, causing it to not work. In this case, you can try simply executing the scan command in Safe mode. Safe mode boots your system with only the necessary Windows components enabled.
- Press the Windows + R keys on your keyboard. This is going to bring up the Run utility.
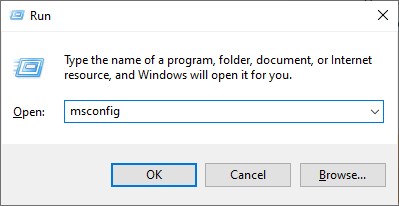
- Type in “msconfig” without the quotation marks and press the Enter key on your keyboard. This will launch the System Configuration application.
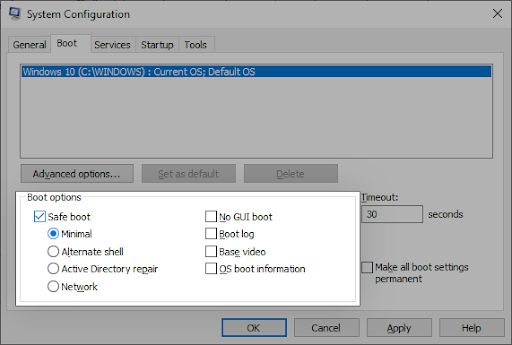
- Switch to the Boot tab. Under Boot options, check Safe boot and keep it on the Minimal setting, then click the OK button.
- Restart your computer. It should boot in Safe mode without any third-party applications, only starting the necessary services. Open the Command Prompt and execute the sfc /scannow command to see if the SFC scan is working.
Method 4. Run the DISM Command
Some users have reported that running the DISM command fixed the System File Checker. The Deployment Image Servicing and Management (DISM) tool re-deploys your system image in order to fix issues directly related to it. The step-by-step instructions to run this scan can be found below.
- Open the search bar in your taskbar by clicking on the magnifying glass icon. You can also bring it up with the Windows + S keyboard shortcut.
- Type cmd or Command Prompt in the search bar. When you see it in the results, right-click on it and choose Run as Administrator.
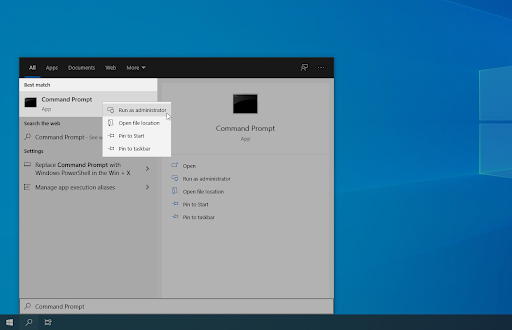
- When prompted by the User Account Control (UAC), click Yes to allow the app to launch with administrative permissions.
- Once the Command Prompt window is open, type in the following command and press Enter to execute it: DISM /Online /Cleanup-Image /RestoreHealth
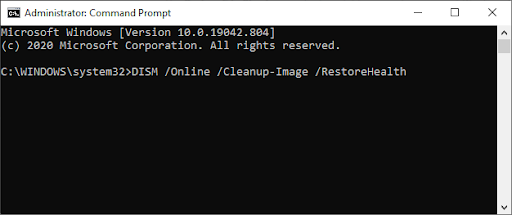
- Wait for the scan to complete, and then restart your computer. When going back to the Command Prompt, try running the SFC scan and see if it works now.
